Getting Started & Signing In
This section walks you through entering the Venezuela Claims Portal for the first time and creating your secure login. Follow these simple steps to access your claim information.
- Enter the access PIN when you first visit the site. You will receive this PIN in your welcome email. Type it into the text field and click Enter. This protects the portal during our initial phase.
- Go to the login page. Enter your email address in the first field and your password in the second field. Click Sign In.
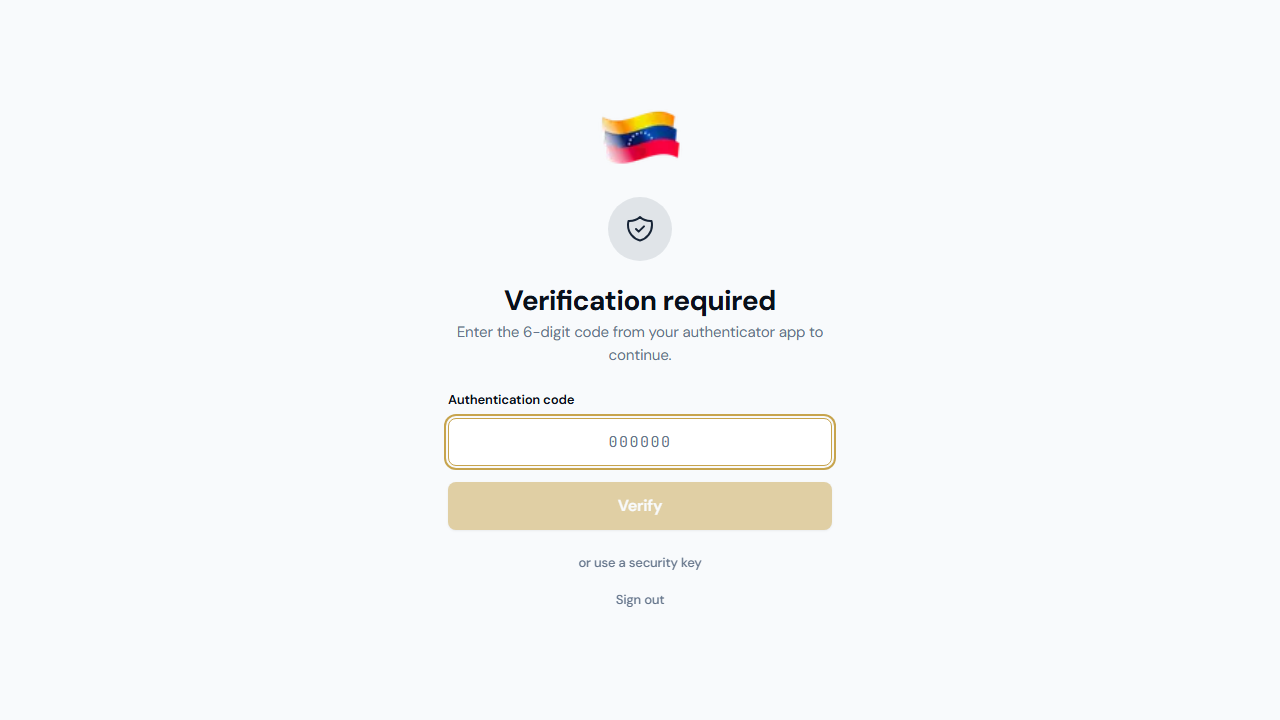
- If you set up two-factor authentication on your account, you will see a code prompt next. Open your authenticator app (like Google Authenticator or Authy) and type the 6-digit code shown there. Click Verify.
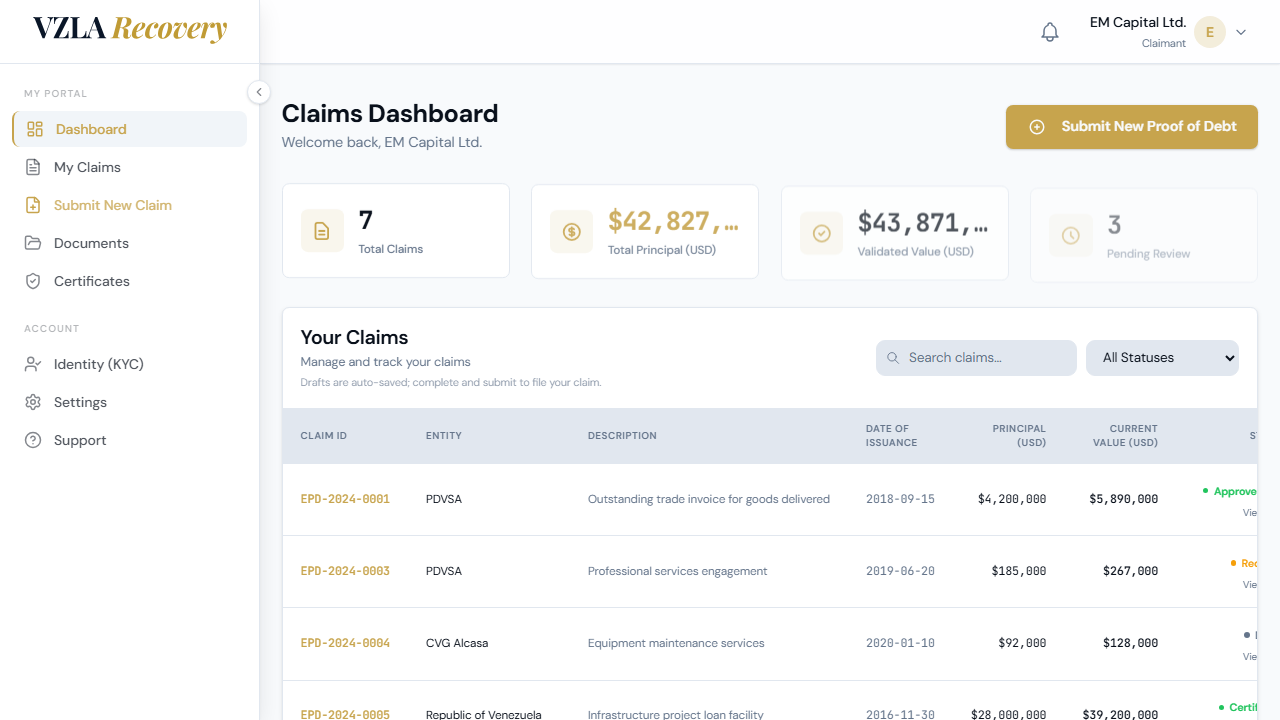
- Once verified, you will enter your personal dashboard where you can view and manage your claims.
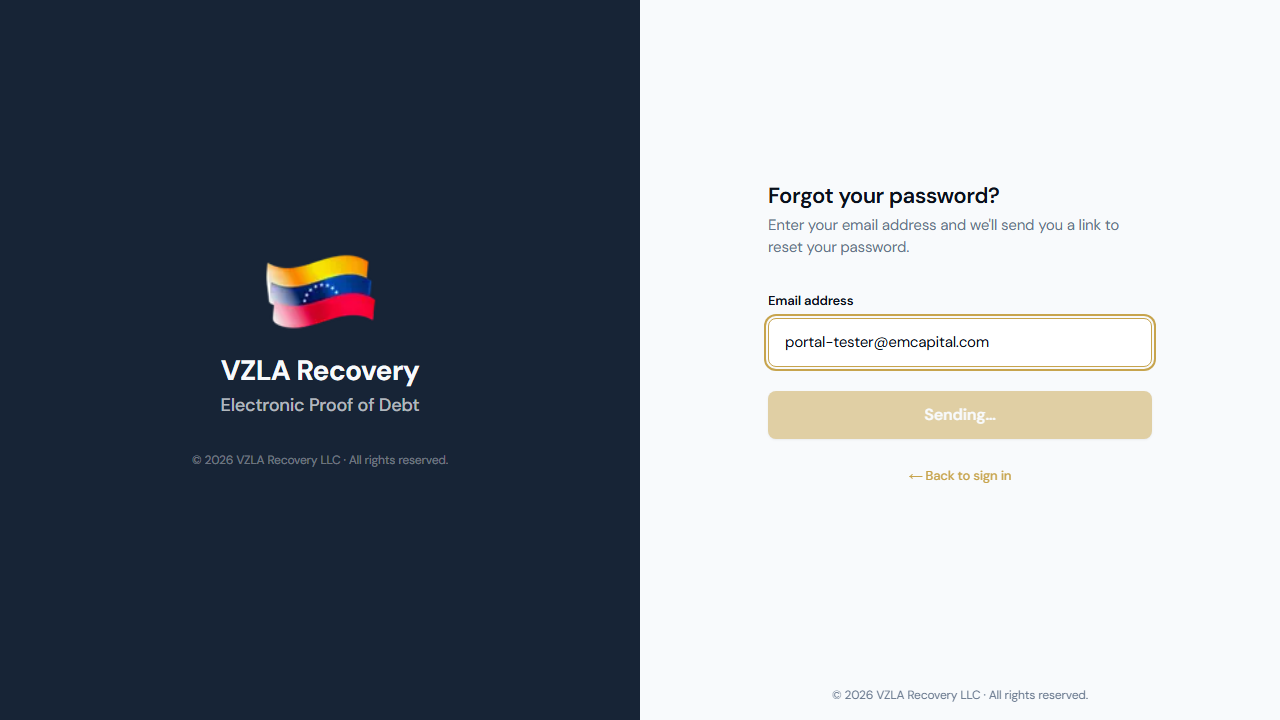
- If you forgot your password, click the Forgot password link on the login page. Enter your email address and we will send you a reset link. Follow the link in your email and create a new password (minimum 12 characters).
- To switch the portal to Spanish, click the ES button in the top right corner of the login page. All text will change to Spanish and your choice will be remembered for future visits.
Frequently asked
What should I do if I don't have the access PIN?
You will receive the access PIN in your welcome email when your account is created. If you did not receive it, contact our support team.
Can I use my fingerprint or face to sign in?
If your account has a security key set up (like a YubiKey or Windows Hello), you can choose to use it instead of typing a code. On the two-factor screen, look for a Use security key button.
How long does my login session last?
Your session will remain active as long as you are using the portal. If you close the browser or leave the site, you will need to sign in again the next time you visit.
Why am I asked for a six-digit code after entering my password?
This is an extra security layer called two-factor authentication. It confirms that you are the real account owner by using an authenticator app on your phone. This protects your claim information.
Completing your identity check (KYC)
Your identity needs to be verified before you can submit a claim. This process takes just a few minutes and confirms who you are so your claim can be reviewed.
- Log in to the portal and go to the KYC page (you'll see a link in the left menu labeled "KYC/Identity Check").
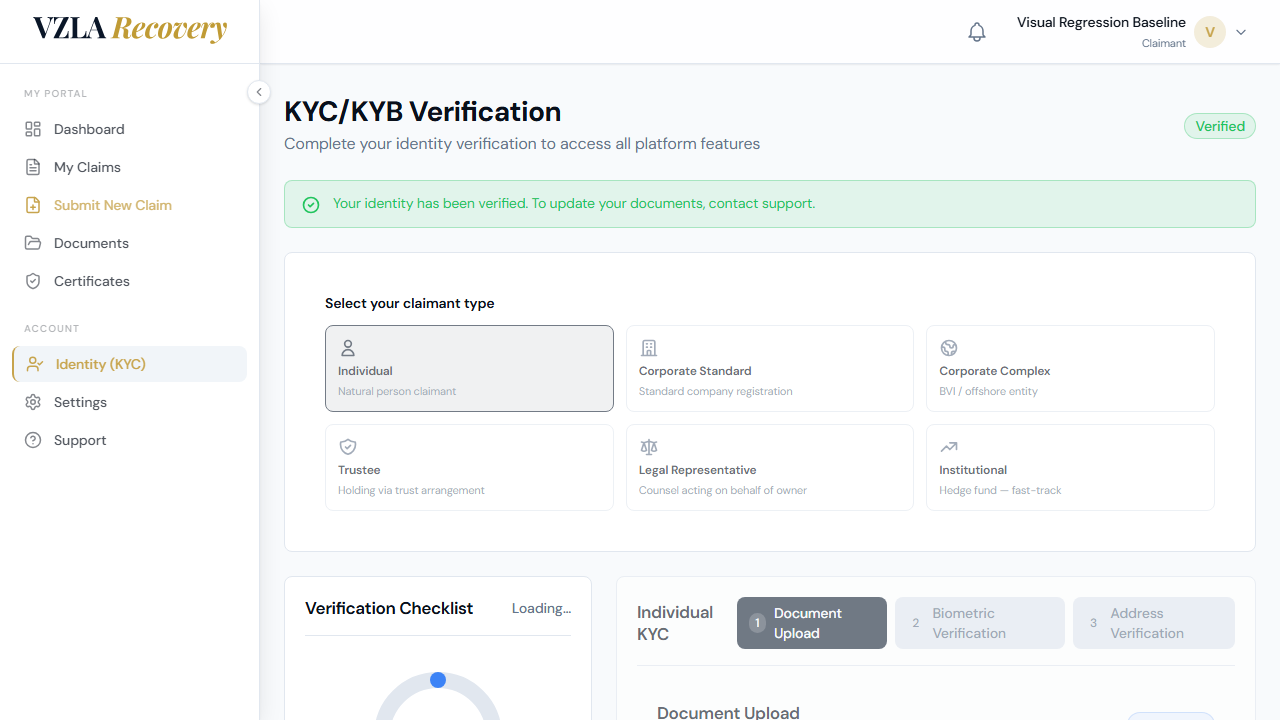
- You'll see a page titled "KYC/KYB Verification" with a subtitle about completing your identity verification. Look at the six boxes showing different claimant types.
- Choose your claimant type by clicking one of the six boxes: Individual, Corporate Standard, Corporate Complex, Trustee, Legal Representative, or Institutional. If you're a natural person (not a company), click "Individual". If you represent a company, click "Corporate Standard" or "Corporate Complex" depending on your company structure.
- Once you select your type, the form below will change to show the documents and information you need to provide. For Individual claimants, you'll upload: Government ID (national ID card or driver's license) and Passport or valid travel document.
- For each document, click the "Choose File" button or drag and drop a clear, color copy of the document. Accepted formats are PDF, JPG, or PNG. Each file can be up to 25MB.
- If you're prompted for address information, fill in your complete current address: Street address, city, postal code, and country.
- Watch the progress bar at the top—it shows how many steps you've completed. Once you've uploaded all required documents and provided all information, your verification will be marked as complete.
- Your status will change from "Pending" (yellow) to "In Review" (blue) as your documents are checked. Once verified, the status will show "Verified" (green).
- Once verified, return to the claim submission form. You'll now be able to submit your claim in the Electronic Proof of Debt (EPOD) wizard.


Frequently asked
Do I need to complete KYC to submit a claim?
Yes. Your identity must be verified (status shows green "Verified" badge) before you can submit a claim. If your status is still "Pending" or "In Review", you'll see a message in the claim submission form asking you to complete KYC first.
What if I upload the wrong document or need to change my claimant type?
You can re-upload documents for any claimant type at any time. Simply go back to the KYC page, select the correct type or re-upload your documents. The compliance team will review the updated documents.
How long does verification take?
Verification typically takes 1-3 business days. Your status will update to "In Review" when the compliance team begins checking your documents, and then to "Verified" once approved. You can check your status at any time by visiting the KYC page.
What if my verification is rejected?
If your status shows "Failed", the compliance team will contact you with details about what was missing or incorrect. You can then re-upload corrected documents and resubmit. Make sure all documents are clear, in color, and readable.
Submitting a Claim (Proof of Debt)
This section walks you through the 8 steps of the claim submission wizard. You'll provide details about your debt and the evidence supporting it, then submit your claim for review.
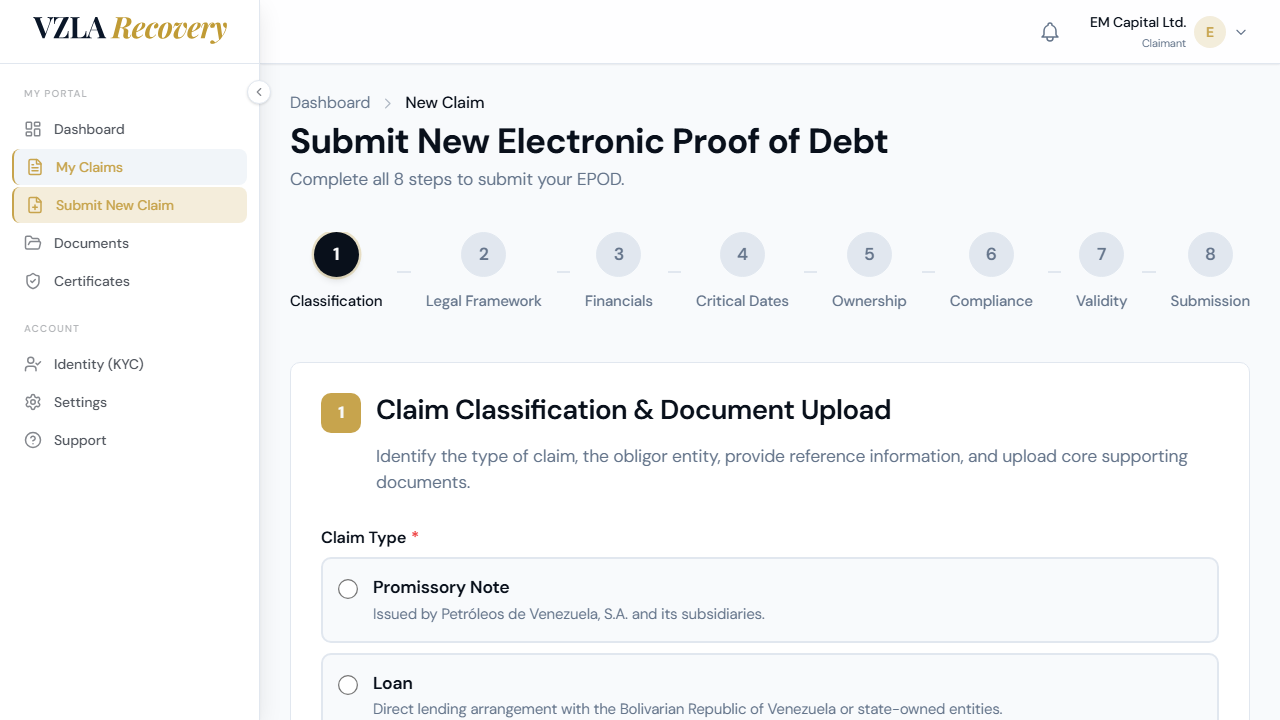
- Click 'Submit Claim' or 'Start New Claim' from the dashboard. The system takes you to a wizard with 8 steps.
- Step 1 (Claim Type): Select what kind of debt you're claiming — choose from options like Bond, Loan, Trade Invoice, or Arbitration Award. Then pick which Venezuelan institution owes you (PDVSA, CITGO, a state-owned company, or other). Upload any documents that prove ownership of the debt — the system asks for agreements, invoices, court cases, or other paperwork depending on your claim type.
- Step 2 (Legal Framework): Choose the governing law (which country's laws apply — for example, New York or English law). Select the currency your debt is in (US dollars, euros, or other major currencies). Check 'Ongoing Litigation' only if there's an active court case, and tick 'ICSID' if it's an international investment dispute.
- Step 3 (Financial Details): Enter the exact principal amount you're owed. The system converts this to thousands for you automatically. Check boxes if you've received partial payments or if the debt has multiple tranches (separate payments).
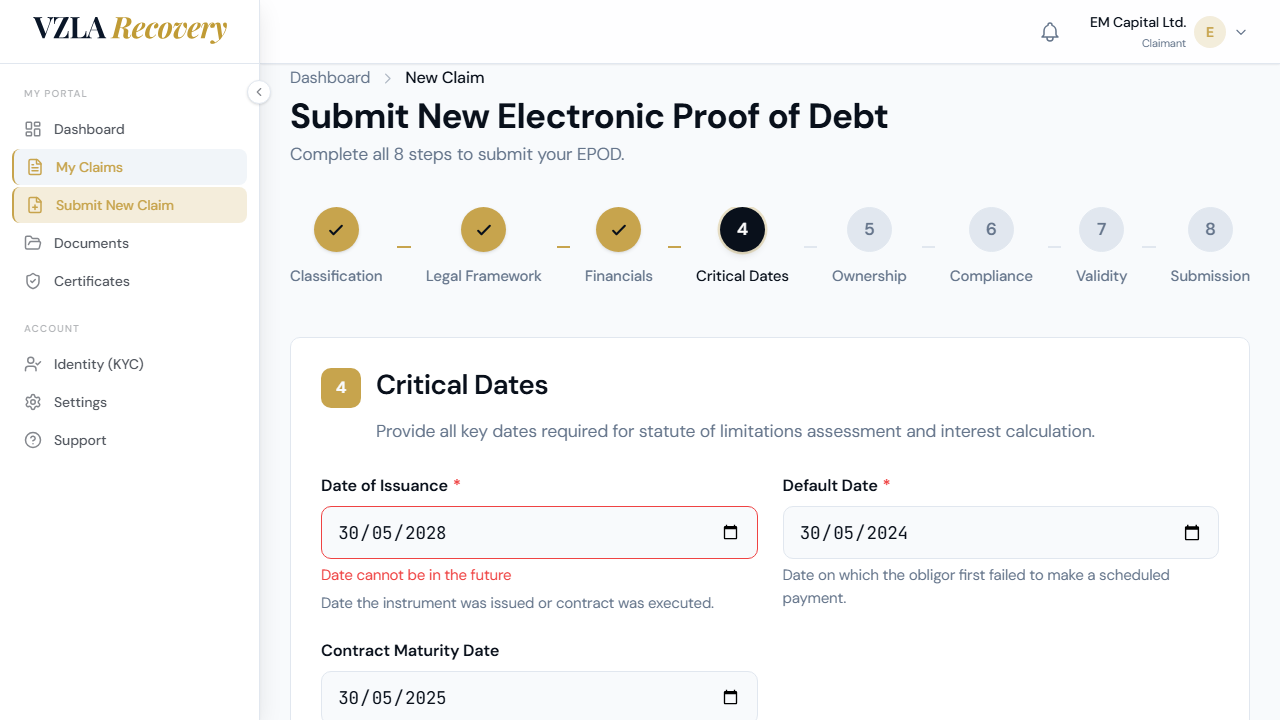
- Step 4 (Key Dates): Enter the date the debt was issued, the date it became due (or was defaulted), and — if you received a payment — the date of the last payment. The system rejects future dates to keep your timeline accurate.
- Step 5 (Who Owns the Claim): Tell us who holds the debt now. If you represent a company or trust, upload a Power of Attorney document. If multiple people own it, list each owner and their ownership percentage — they must add up to 100%.
- Step 6 (Compliance): The system checks your anti-money-laundering status. If you haven't completed Know Your Customer (KYC) verification, click the button to start it. Tick the required boxes confirming you're not on any sanctions lists and that you're eligible to file.
- Step 7 (Statute of Limitations): The system checks how much time remains to claim your debt under the law you selected. The green 'Eligible' result means you're within the deadline; yellow 'Needs Review' means you're close to the cutoff; red 'Time Barred' means you've run out of time. You can still submit (unless barred), but a reviewer will examine it.
- Step 8 (Affidavit & Submit): Read the legal affidavit confirming your claim is truthful. Type your full legal name as your signature, check the required boxes, and click 'Submit Claim'. The system records the date and time, and your claim becomes permanent — it cannot be edited after submission.

Frequently asked
What if I don't finish all 8 steps at once?
The system automatically saves your progress every 2 seconds. You can close the browser anytime, and when you return, you'll see a prompt to continue where you left off or start fresh. Your draft is saved for 365 days.
Can I change my claim after I submit it?
No. Once you click 'Submit Claim' and sign the affidavit, your claim is locked permanently. The compliance reviewer and you can see notes or requested info, but the core claim data cannot be edited. Make sure all details are correct before you submit.
What if my debt is 'Time Barred' (red result in Step 7)?
That means your deadline has passed under the law you selected. You can still submit your claim, but a reviewer will examine it carefully. Submitting a time-barred claim does not guarantee approval.
What documents do I need to upload?
The system tells you which documents apply to your claim type. For example, a Trade Invoice claim needs a Purchase Order and Invoice; a Bond claim needs the original agreement and proof of transfer. Upload PDFs, images, or scans that prove you own the debt.
Tracking your claims
Learn how to see where your claims are in the review process and view their current status at any time.
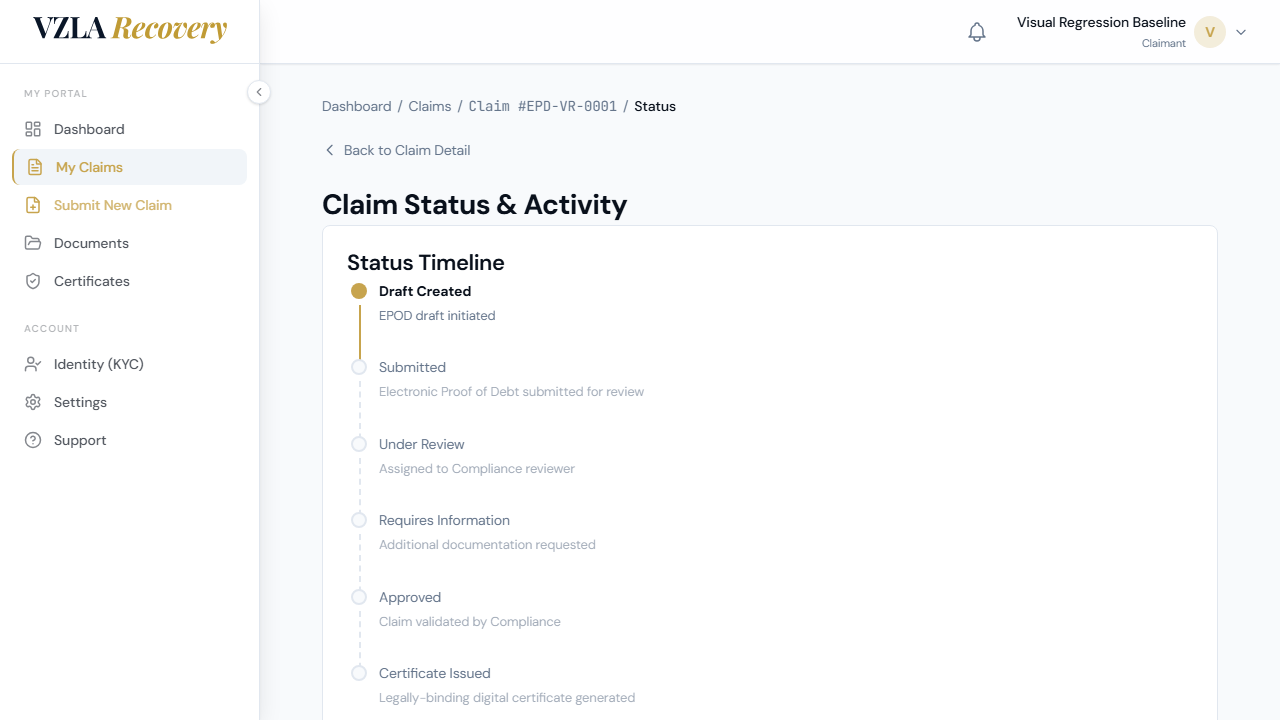
- Log in to your claims portal and go to the Claims Status page by clicking 'View Status' next to any claim on your dashboard.
- You will see a visual timeline showing the six stages of your claim: Draft Created, Submitted, Under Review, Requires Information, Approved, and Certificate Issued.
- Green checkmarks show stages you have completed. A gold pulsing dot marks where your claim is right now.
- Empty circles show what comes next. The dates next to each completed stage tell you when that step happened.
- Scroll down to read any feedback from the Compliance Reviewer explaining the current status of your claim.
- Below that, you will see a message thread showing any clarification questions and your responses. You cannot add new messages from this page.
- The Activity Log at the bottom shows a complete record of all actions on your claim, including who did what and when. Every timestamp is recorded for your records.
- To go back to your claim's full details, click 'Back to Claim Detail' at the top of the page.


Frequently asked
How do I know which stage my claim is at right now?
Look at the visual timeline on the page. The stage with the gold pulsing dot is your claim's current status. The stages with green checkmarks have already been completed.
What does it mean if my claim is at 'Requires Information'?
The Compliance Reviewer has asked for more details or documents from you. You will see their specific questions in the Compliance Reviewer Feedback section and in the message thread below it.
Can I reply to the Compliance Reviewer's messages on this page?
No. The message field on this page is read-only for your reference. If you need to submit a response to a clarification request, you will do that through a separate submission flow in the portal.
Why can't I download my certificate yet?
The Download Certificate button is locked until your claim reaches the Approved stage. Once your claim has been validated and moves to the Certificate Issued stage, you will be able to download it from this page.
Uploading Documents & Your Profile
This section shows you how to upload supporting documents for your claim and manage your profile settings. You can view documents you've already uploaded, request replacements if needed, and update your name at any time.
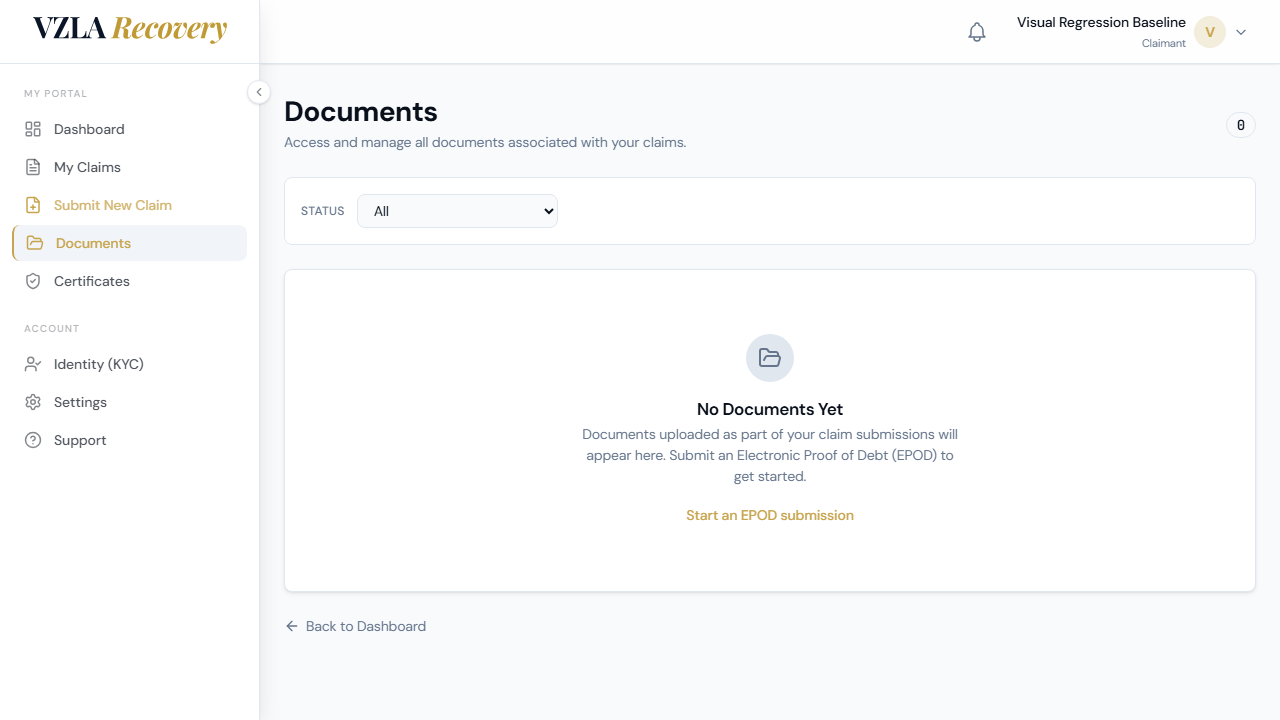
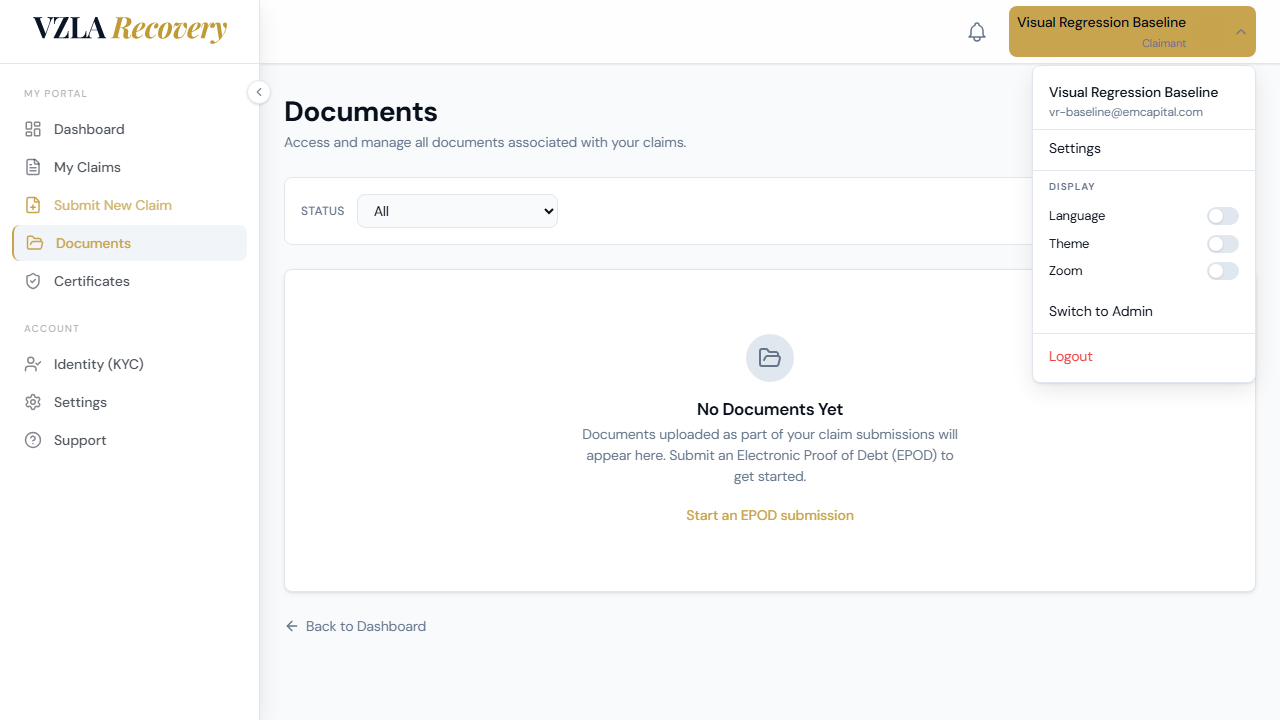
- Click "Documents" in the left-side menu to open your document library.
- Your page shows a list of all documents you've uploaded across all your claims. If you haven't uploaded any yet, you'll see an empty folder icon with a message inviting you to submit a claim.
- To filter documents by status (like Recently Uploaded, Under Review, or Accepted), use the dropdown menu labeled "Filter" at the top of the page.
- To download a document you've already uploaded, find it in the list and click the Download button (the down-arrow icon) in the Actions column.
- To request a replacement for a rejected document, click the Refresh icon in the Actions column next to that document. A confirmation will appear—click OK to confirm the request. The document status will then change to "Replacement Requested."
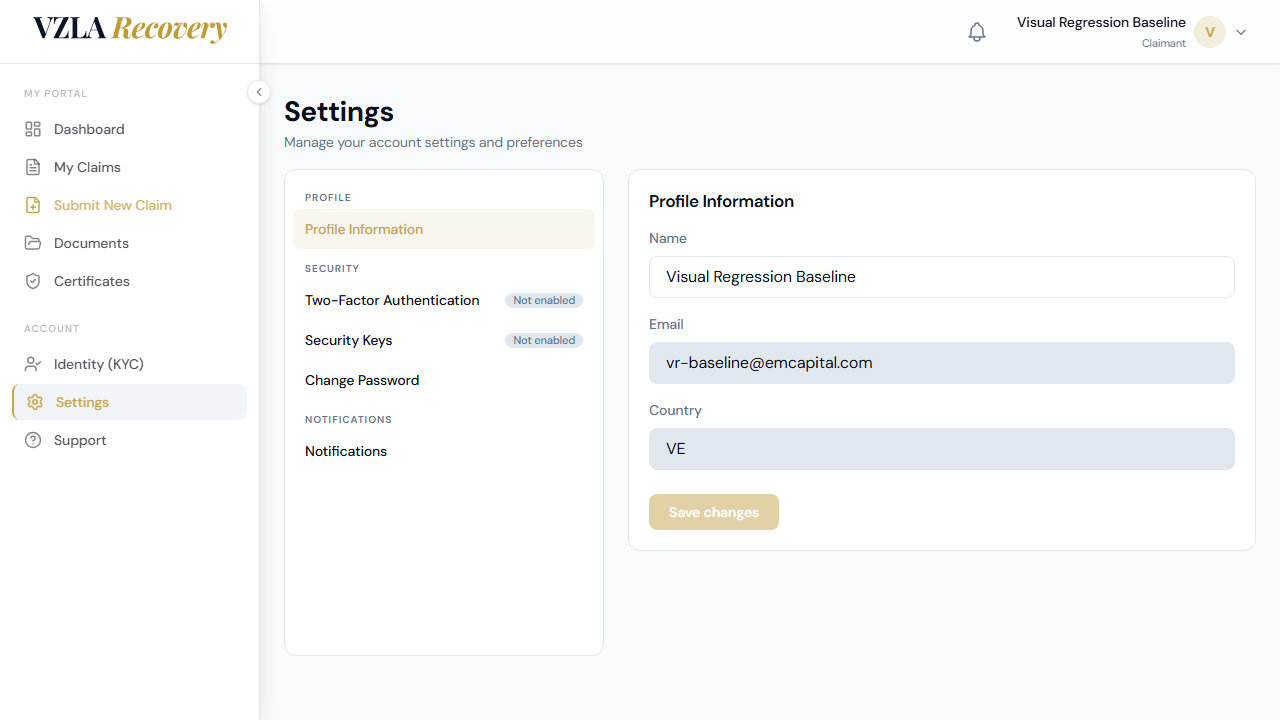
- Click "Settings" in the left-side menu to open your profile.
- On the Settings page, click "Profile Information" in the middle column to open your profile editor.
- You can edit your name in the Name field. Your Email and Country are read-only and cannot be changed here.
- After updating your name, click the "Save" button. A green checkmark will appear briefly to confirm the change was saved.
- In the same Settings page, you can also manage Two-Factor Authentication ("2FA") and Security Keys under the "Security" section, and adjust email notification preferences under "Notifications".
Frequently asked
Can I upload documents directly from the Documents page?
No. Documents are uploaded during the claim submission process. Go to "New Claim" to submit a new claim with supporting documents. The Documents page shows documents you've already uploaded and lets you download or request replacements.
What do I do if my document was rejected?
When a document is rejected, its status will show as "Rejected" in red. Click the Refresh icon (circular arrow) next to the rejected document and confirm to request a replacement. You'll be able to upload a corrected version.
Can I change my email address or country?
No, your email and country fields are locked and read-only on the Settings page. These were set when you created your account. If you need to change them, contact the support team.
Where do I change my password or set up two-factor authentication?
Click "Settings" in the left menu, then select "Change Password" or "2FA" in the middle column under the Security section. Both have their own inline forms on the right side.
Certificates, Messages & Support
Once your claim is approved, you can download your digital certificate, contact support via email, and check for updates through the portal.
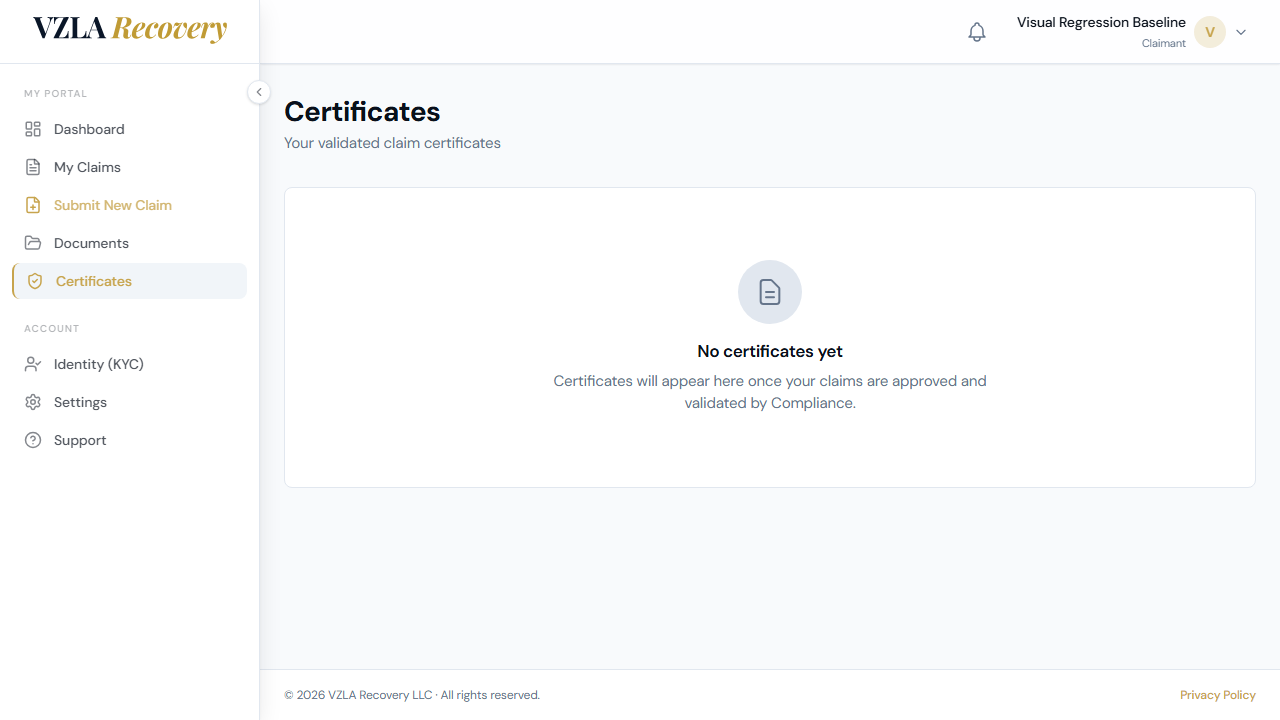
- Click on **Certificates** in the left sidebar menu to see all your approved claims.
- On the Certificates page, you'll see cards for each approved claim showing the claim ID, your entity name, the validated amount in gold, and the issue date.
- To view the full certificate details, click the **View** button on any certificate card. A detailed certificate will open in a popup window showing your claim reference, validated amount, governing law, a QR code for verification, and government branding.
- To download your certificate, click the **Download Certificate** button. You'll see a checkmark appear for 2 seconds to confirm the download started.
- To close the certificate details popup, click outside the popup or press the Escape key on your keyboard.
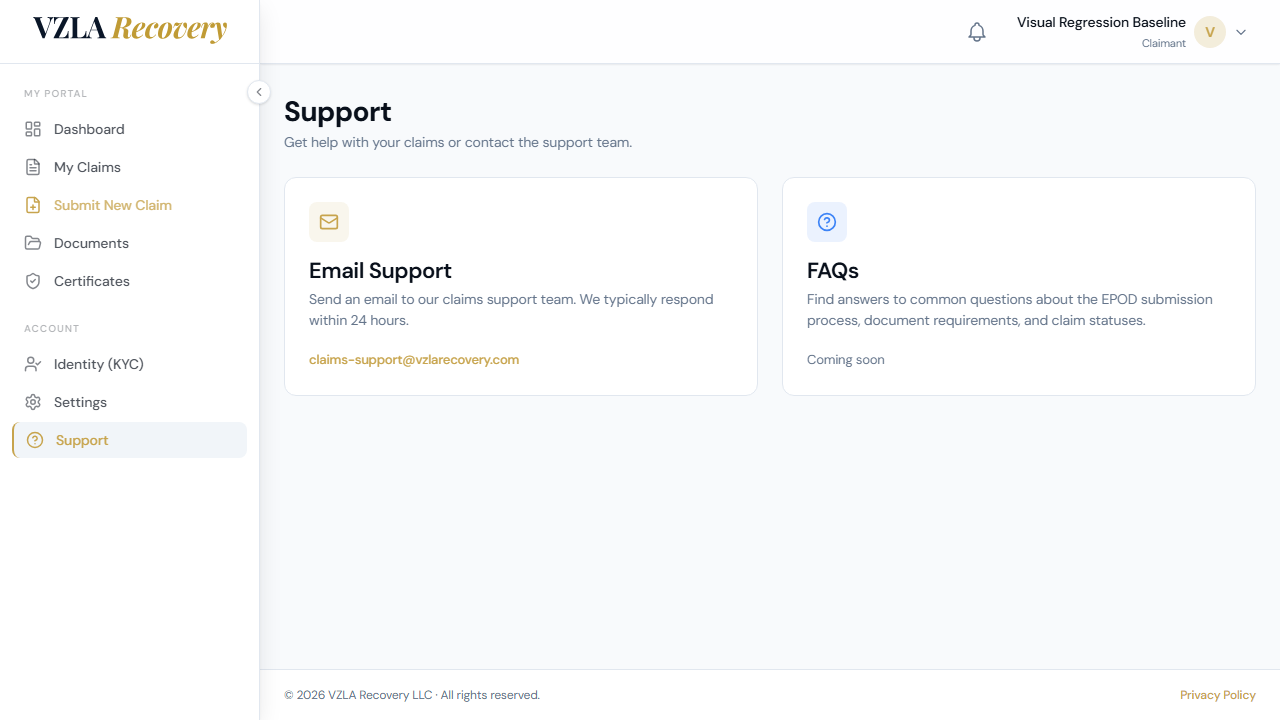
- Click on **Support** in the left sidebar to find two contact options: an Email Support card with a link to contact us by email, and a FAQ card (coming soon).
- In the Support page, click the email address link under Email Support to open your email client with our support address pre-filled.
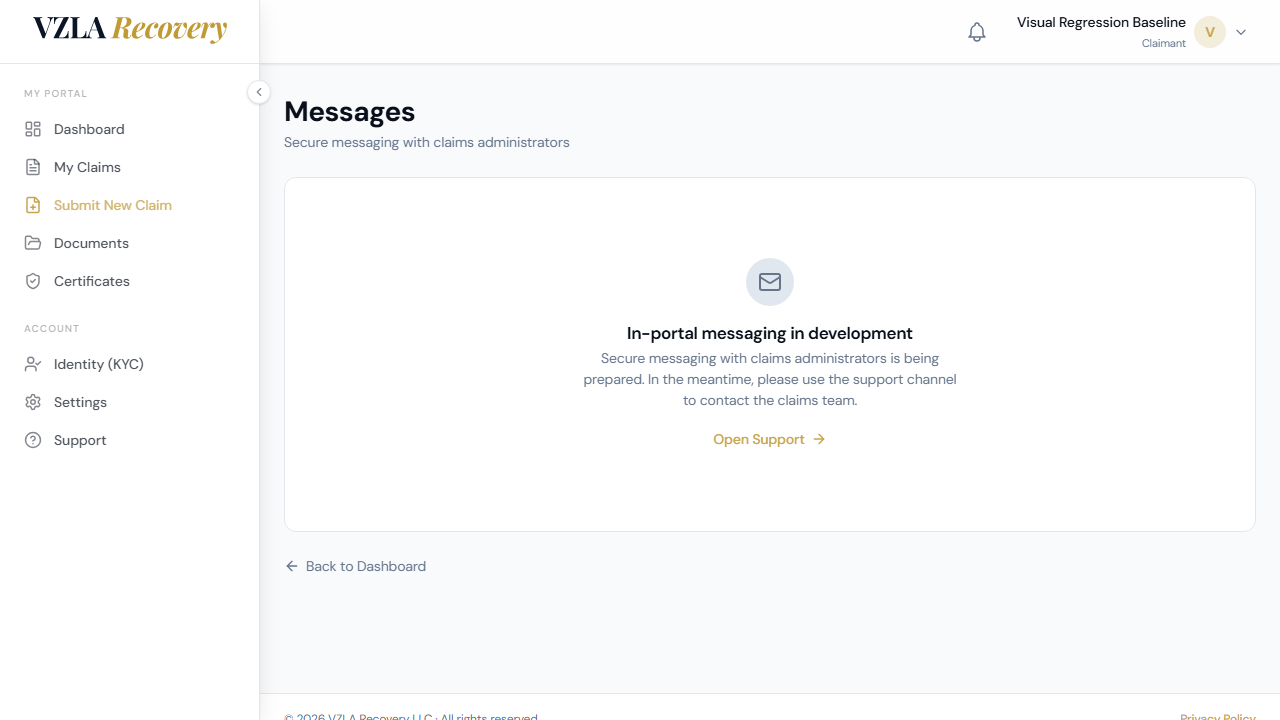
- Click on **Messages** in the left sidebar to access your communication inbox. This feature is coming soon and will allow you to exchange messages about your claims.
- On any of these pages, use the language toggle (EN/ES) in the top right to switch between English and Spanish.
Frequently asked
What happens if I don't see any certificates?
You'll only see certificates for claims that have been approved. If your claim is still under review, submitted, or in draft, it won't appear on the Certificates page yet. You'll receive an email notification when your claim is approved.
Can I share my certificate with someone else?
Each claimant can only see their own certificates. Your certificate is linked to your account. Only you can access and download your approved certificates from your login.
What if the email link doesn't work?
The email link will open your default email program (Outlook, Gmail, Apple Mail, etc.). If it doesn't work, you can manually copy the email address from the Support page and paste it into a new email. The email address is displayed clearly on the Support card.
When will the Messages feature be available?
The Messages feature is currently in development. For now, use the Support page to contact us via email, or check your email inbox for updates about your claims. We'll announce when full messaging is ready.